Last weekend our son turned the big ONE year old! This mommy was both excited and sad at the same time that her little baby is growing up! If you know me you know that I enjoy hosting themed parties...especially kids birthday parties....especially my kids birthday parties. I go all out...well not all out....I make most of the decorations and do most of the food preparation on my own (with some help from my husband and three year old daughter) and I try to keep things way under budget. I am way big on shopping the sales, using coupons, and finding the best deals.
The first thing I do....pick a theme. Months in advance we pick a party theme....our daughter helped pick the train theme for this party. (For my daughters previous parties she had a tractor themed party and a Dora the Explorer themed party.)
The next thing I do... Write out our guest list: at this age of our children our guest list consists of family (grandparents, great-grandparents, aunts and uncles, cousins, great-aunts and great-uncles, etc) and close family friends. The guest list gives me an idea of how much food we will need, brainstorming decoration ideas, and deciding upon a location.
After the guest list is made up I pick a location. Since my son's birthday is in May we decided an outdoor location would be great. We picked a local park and reserved a shelter with a top just in case it rained.
Then I get started on the invitation....which I always make myself! I feel it is more personal that way and I can match it perfectly to the theme we decide upon. Below is a picture of the invitation. On the back I included other important information like a lunch would be served, the party would still happen even if it rained as we were in a shelter, directions to the shelter, etc.

Next I dive into the decorations. All the while brainstorming about how to organize it all for transportation. I also keep brainstorming the food and I start making my lists (food ... so I can watch the sales; decorations ... what I need to purchase based upon what I decided to make; and so on).
Then it was onto planning the food. To see what decorations and food we decided to make keep on scrolling!
Here is my son with the cute poster board (with cardboard backing) train I made. It was way easier than it looks to make. All I needed was different colored poster board, large pieces of card board, a glue stick, packaging tape, scissors, an exacto knife, pre-cut alphabet letters, and paper plates. My husband attached the lathes (wood pieces) to the back with some more packaging tape and a staple gun.

What train party wouldn't be complete without a railroad crossing sign? It was a bit windy so it's hard to tell but one part of the X says "birthday" and the other side of the X says "crossing". I used white poster board and left over red and black poster board from the train to make this.


Here is the refreshment table....
On the ground next to the table we had a cooler full of assorted juice boxes, juice pouches, and flavored water...all bought on sale leading up the party.

This cooler was full of assorted kinds of sodas.... I bought all on sale a month or two before the party! This one was labeled "Diesel Fuel"

A close up of the sign...


Here was the guest table and the gift drop off table.....
There was a sign on the table asking guests to sign the Thomas the Train book with a nice note for my son to enjoy over and over again throughout the years. There was also a sign that read "All Aboard!"

I wish I'd thought to take a close up picture of the cute cookie trains I made. For these I used my Cricut machine to cut out the trains, some colorful cardstock, some hot glue, and small packages of cookies. It was so easy to make thanks to the Circut!

On the food/serving table we made a train engine using left over poster board. I made the train cars using plastic tote baskets I bought from the Dollar Tree (I plan to re-purpose these to hold items/food in my pantry) and some colored construction paper for the wheels. This had a sign that read "Dining Car".
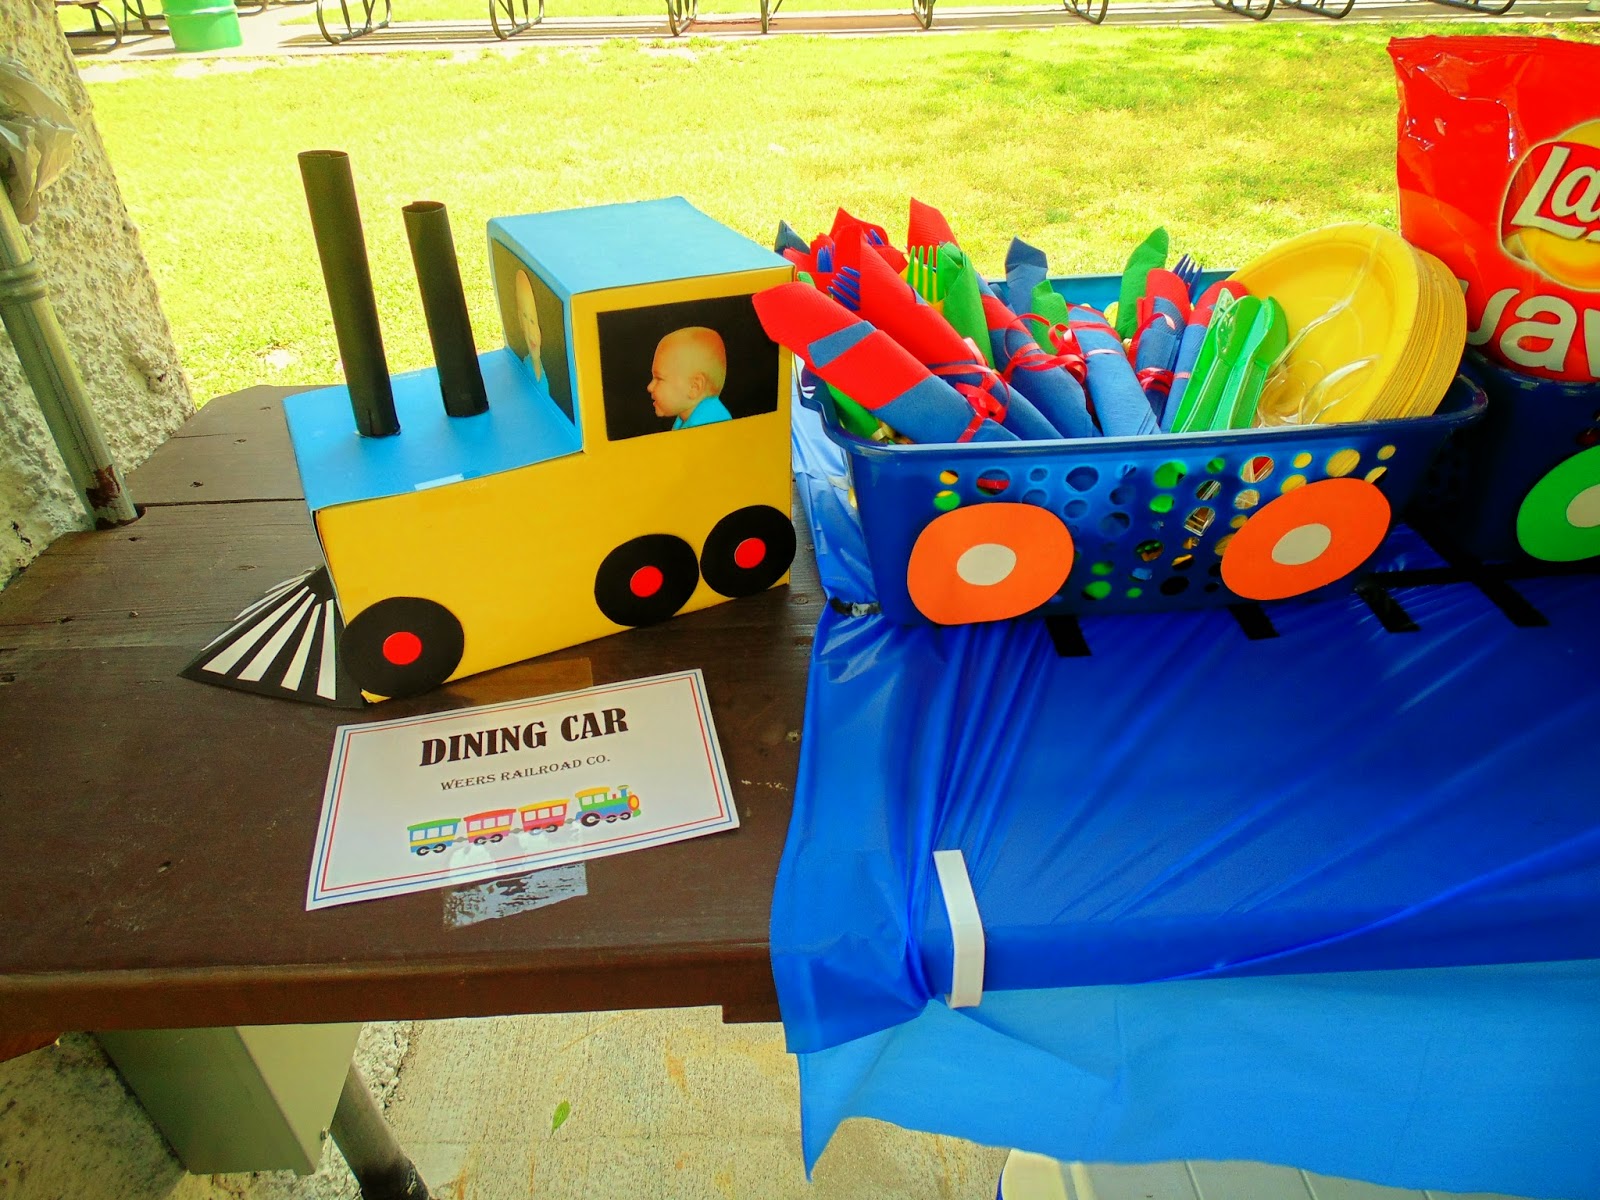
Here is a close up of the train engine..... I used left over poster board, scissors, a glue stick, tape, a picture of Thomas the train (for the front I printed off the internet) and three pictures of my son (I printed off on card stock).

Here is another picture of the train....The first train car held the yellow paper plates and the utensils wrapped in colored napkins. The second and third train cars held plain and barbecue chips (I left them in the bags for easy clean up).

Here is a close up of the train engine.... I was super excited how it turned out as I wasn't quite sure what it would wind up looking like. I have to credit my mother who suggested we take a front view and side view pictures of my son to place in the windows....good idea mom!


A picture of the whole food train!

It's hard to see in the above pictures but it was super cool to see in person....my father-in-law made this awesome looking train track for the train cars using electrical tape I got at Walmart on a blue plastic table cloth I also got at Walmart!

Here is the first dining car with the utensils....

This was the fourth dining car....full of yummy fresh vegetables...this was the "produce car"... all bought on sale!

The fifth basket had fresh skewered fruit kabobs! They were so yummy. I bought the ingredients on sale just before the party...what I used was decided upon by what was on sale! I wound up making 40 kabobs and still had lots of leftover fruit at home! I used red grapes, mango, watermelon I had cut into stars using my PopChef (I got as a birthday gift this from my kids), cantaloupe, and strawberries....Yum! That morning I cut up all the fruit and with my husbands help skewered all the fruit! It took us about an hour from prep time, to cut up time, to skewer time and to clean up. Not bad!

The sixth and final car had left over watermelon I just cut up into slices (I left the rind on for easy no mess eating).
At the end of the train cars was the train sub sandwiches I made that morning with my husband. I bought the turkey, cheese, and ham on sale weeks before the party and froze it. Then two days before the party I let it thaw in my refrigerator. I also bought the shredded lettuce on sale the day before the party. I preordered four loaves of french bread from our local grocery store to be made up fresh and ready for me to pick up the night before. The only thing here I paid full price for was the cucumber and that only cost me $1.25!
I also made the disposable trays the sub sandwiches were on. I used large pieces of cardboard and cut them to matching sizes then covered them in foil and taped the foil on the underside. To get it to the party I placed them facing inward toward each other in a new, clean, never before used trash bag. I also wrapped the sub sandwiches in saran wrap and cut it at the park so they would not fall apart in the transportation.

And we can't forget about the condiments...I had a left over basket and it was windy so I placed the pickles and ranch dressing in that basket. On the table to the left are cut up tomatoes and cut up onions. In the middle is mustard, bbq sauce and miracle whip. And guess what? I bought all the condiments on sale and/or with coupons (the mustard, bbq sauce, pickles, ranch and miracle whip)! Score! The containers I used were left over take out containers that I clean and keep for these exact kind of things. I also take extra left over containers and zip lock type baggies for easy clean up and to send home leftovers with others.

After eating the delicious food we enjoyed some yummy cake.
Pictured below is a FREE....yes I said FREE....six inch cake from our local Russ's Market. Did you know for your child's 1st birthday with a coupon (you can get right there in the store) you can get a free six inch cake at Russ's? We placed the order for it two weeks in advance and got to pick out the flavor of the cake (we went with a marble cake), the type of frosting (we went with whipped frosting), and the decoration from the bakers suggestions (I wanted it pretty simple as this was being added to the cupcakes I was already making). When we picked up the cake we simply gave the coupon to the cashier and it rang up free (otherwise it cost $5.99). The coupon also has a $5 off coupon if you wish to place an order for a larger cake....which I opted out of because I was already making the cupcakes! The free six inch cake wound up being my son's "smash" cake!

Here are the "homemade" cupcakes. I used boxed cake mixes and store bought frosting to make these to save me a little bit of time. The blue cupcakes were blue raspberry flavored and the light green cupcakes were key lime. They were delicious! I found cute Thomas the Train cupcake wrappers at Party America!


I made the cupcake toppers using Thomas pictures I found online and printing them off on white card stock. I then cut them out, took a toothpick, and some hot glue and put them all together! You can't tell but they are double sided!

Here is my son enjoying the delicious fruit!


Here is the garland I made to go around his high chair. I used Thomas the Train scrapbook paper, my Cricut machine to cut out the circles, card stock, and train ribbon (from Walmart). I used Thomas the rain pictures I found online and typed out "Hunter is one!" then printed it off on white card stock. I used hot glue to hold it all together.


Family picture time! Here is our little family! My daughter was a bit upset in this picture because she didn't want to stop playing with her cousins to take this picture.

Hunter's first cake.... he's not quite sure about it!


Opening the gifts! Hunter was sure spoiled!


This sign was at the end of the food table! Thank you for "choo-choosing" Weers Railroad Co.

Here are the gift bags I made using a Thomas train printout I printed on white printer paper then cut out. I glued it onto a blue paper bag and filled it with fun treats!

Here is what was inside: bubbles with a printed and taped on Thomas the Train label (I found these bubbles in a 4 pack at the Dollar Tree), fruit snacks (bought on sale!), a train whistle (bought in bulk from the Oriental Trading Company), and a conductor hat (also bought in bulk from the Oriental Trading Company).


Here is how they were displayed....in a suitcase (which was great for transportation to the park!) with a sign that said "Baggage Claim".

After every party I take a picture of my child with all the gifts they received during the party so we can remember what they received (in addition to writing it down during the party for thank you notes) and to remind us how special they are!

Happy 1st Birthday, Hunter!