I love throwing themed parties and birthday parties are no exception! My daughter turned three in January and requested a Dora the Explorer themed party. I give her a few suggestions of things I know she is currently interested in and let her make the final decision. That is how we wound up with a Dora themed party.
The first thing I did was search the internet for ideas. This took place over the next few weeks...yes I start planning birthday parties about eight weeks in advance.
Next I made the guest list.
Then I "booked" the place for the party. Since it is January in Nebraska I could rule out anywhere outside! I went to my resources and asked my grand-mother-in-law if she could reserve the reception/cafeteria at the retirement community where she lives. It is a perfect place to have a party! You may also consider an apartment club house, a church reception area, a Masonic hall, an enclosed park shelter...use your imagination and your resources!
Now it was time to get started on the invitations. I dislike store bought invitations...they just aren't for me. I'd rather make and add some personal touches to our invitations.
Invitations:
Front of the envelope (made to look like Dora's backpack)
Back of envelope
Invitation (I made at home on my computer and printed on a white card stock paper)
Next it was time to start on the decorations and brain storm food ideas. Here is what I came up with!
Decorations:
The sign I made for the front door!
(Materials used: computer, printer, computer paper, scrapbook paper, thin card board, painters tape to hang it up)
Homemade binoculars placed in a basket from the Dollar Tree on the guestbook table for the kids to use on their scavenger hunt and to take home afterwards.
(Materials used: toilet paper rolls, colored card stock paper, Dora stickers, yarn, a hole punch, and a stapler)
Dora, Diego (and Boots...not pictured) masks placed on the tables for guests to play with. I made 15 total for each child (and some adults) to take home.
(Materials used: computer, printer, white card stock paper, scissors, hot glue/glue gun, and tongue depressors).
You can find the masks here along with several other character masks!
Homemade Dora and characters wands placed in clear glass vases with colored tissue paper in the middle of the tables. Each child got to take one home with them!
(Materials used: long dowel sticks from Michael's Craft Store cut into thirds by my husband, hot glue/glue gun, colored card stock paper...I used my cricut to cut the circles, colored ribbon, computer/printer, printer paper)
Here are the decorated tables....purple table cloths (purchased from the Dollar Tree), streamer/crepe paper in pink down the middle of the tables, crayons, large Dora coloring pages (purchased from Walmart), Dora and character table toppers (homemade), Dora candy (purchased from Party America), the Dora wands in the glass vases, and the character paper masks.
Another view of the table decorations!
Here is a close up!
A close up of the wands in the glass vases with colored tissue paper!
Here is a close up of the Dora and characters table toppers.
(Materials used: colored card stock, white card stock, computer/printer, hot glue/glue gun, tooth picks, styrofoam, scissors)
A close up of the gift bags used during the party as part of the table decorations. They are decorated to look like Dora's backpack. Inside I included 2 small coloring pages (rolled and taped), a small pack of crayons, candy in pink, purple and orange, bubbles, and Dora stickers!
Food:
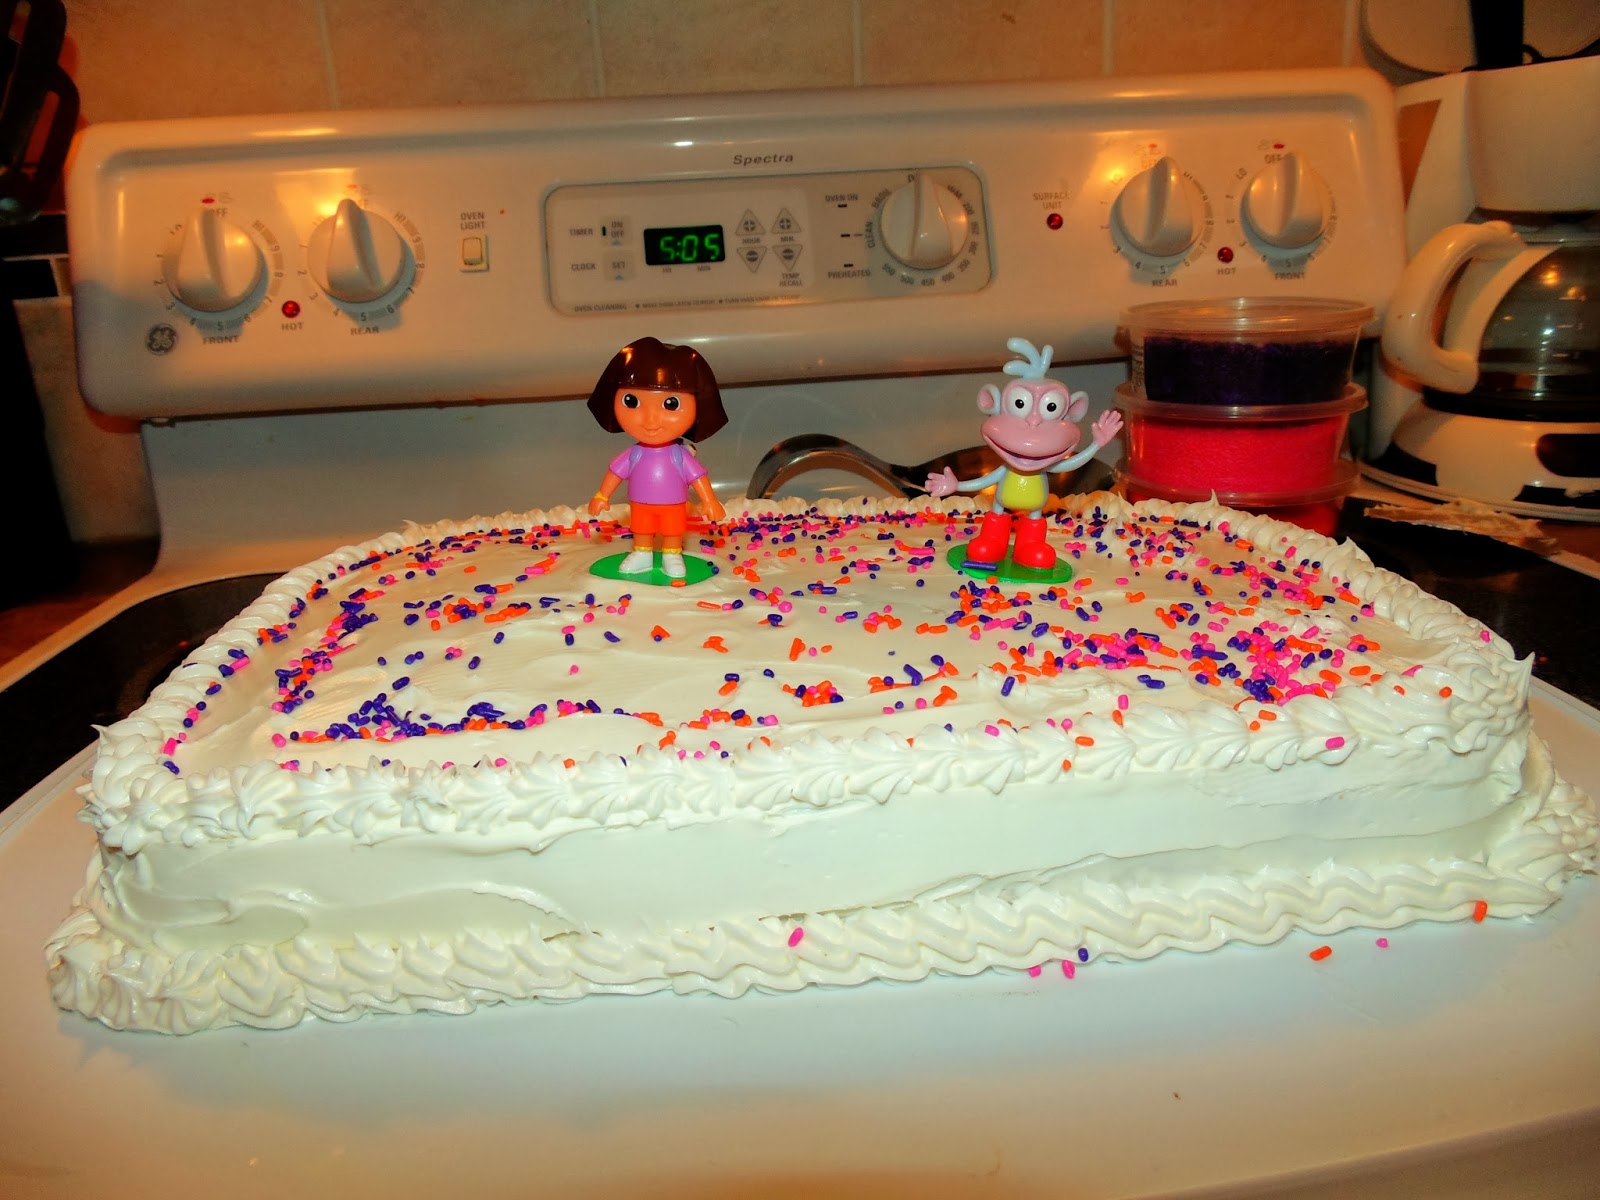
A homemade Dora and Boots cake. I used boxed white cake mix that we colored the batter pink, orange and purple (see picture below). We frosted it with white frosting, used these Dora and Boots cake toppers (from a Dora game), and put on colored sprinkles! It was yummy!
Some of the items on the serving table! We had nachos with cheese sauce (warming nearby in a crock pot), salsa, nacho trays and jalapenos. We labeled this area "Dora's Nacho's". All the food (except the jalapeno's and the homemade hot salsa) came from Sam's Club!
Next to "Dora's Nachos" we had candy coated chocolate balls (from Incredible Bulk). Laffy Taffy, bubble gum, and flavored tootsie rolls in pink, purple and orange (from the bulk area at Super Saver). And "Map's String Cheese" which we drew Map's face on using sharpie markers (bought on sale in a large bag at Super Saver).
Here is a close up of "Map's String Cheese"
We also made "Map's Rice Krispie Treats". I got these in a big box of assorted kinds at Sam's Club. We printed off map's face onto regular white printer paper and taped it around the Rice Krispie Bars!
Dora's sidekick is Boots....he's a blue monkey! So we decided to make "Boot's frozen chocolate covered bananas". We bought bananas a few days before the party, dipped them in chocolate almond bark, put some colored sprinkles on them and popped them in the freezer. They were yummy!
My husband and I also made these yummy chocolate cake balls! We used colored chocolate and colored sprinkles on these!
Oh so yummy punch. Ingredients: 2 liter sprite, 1 frozen raspberry lemonade from concentrate, 2 oranges sliced, and frozen red grapes!
Here is the inside of our tie-dye cake!
And a close up of the punch!


